To whitelist a domain, you’ll need to modify your inbound spam policy.
1. Sign in to your Microsoft 365 Defender portal2.
2. Click on Policies & rules in the left-hand menu
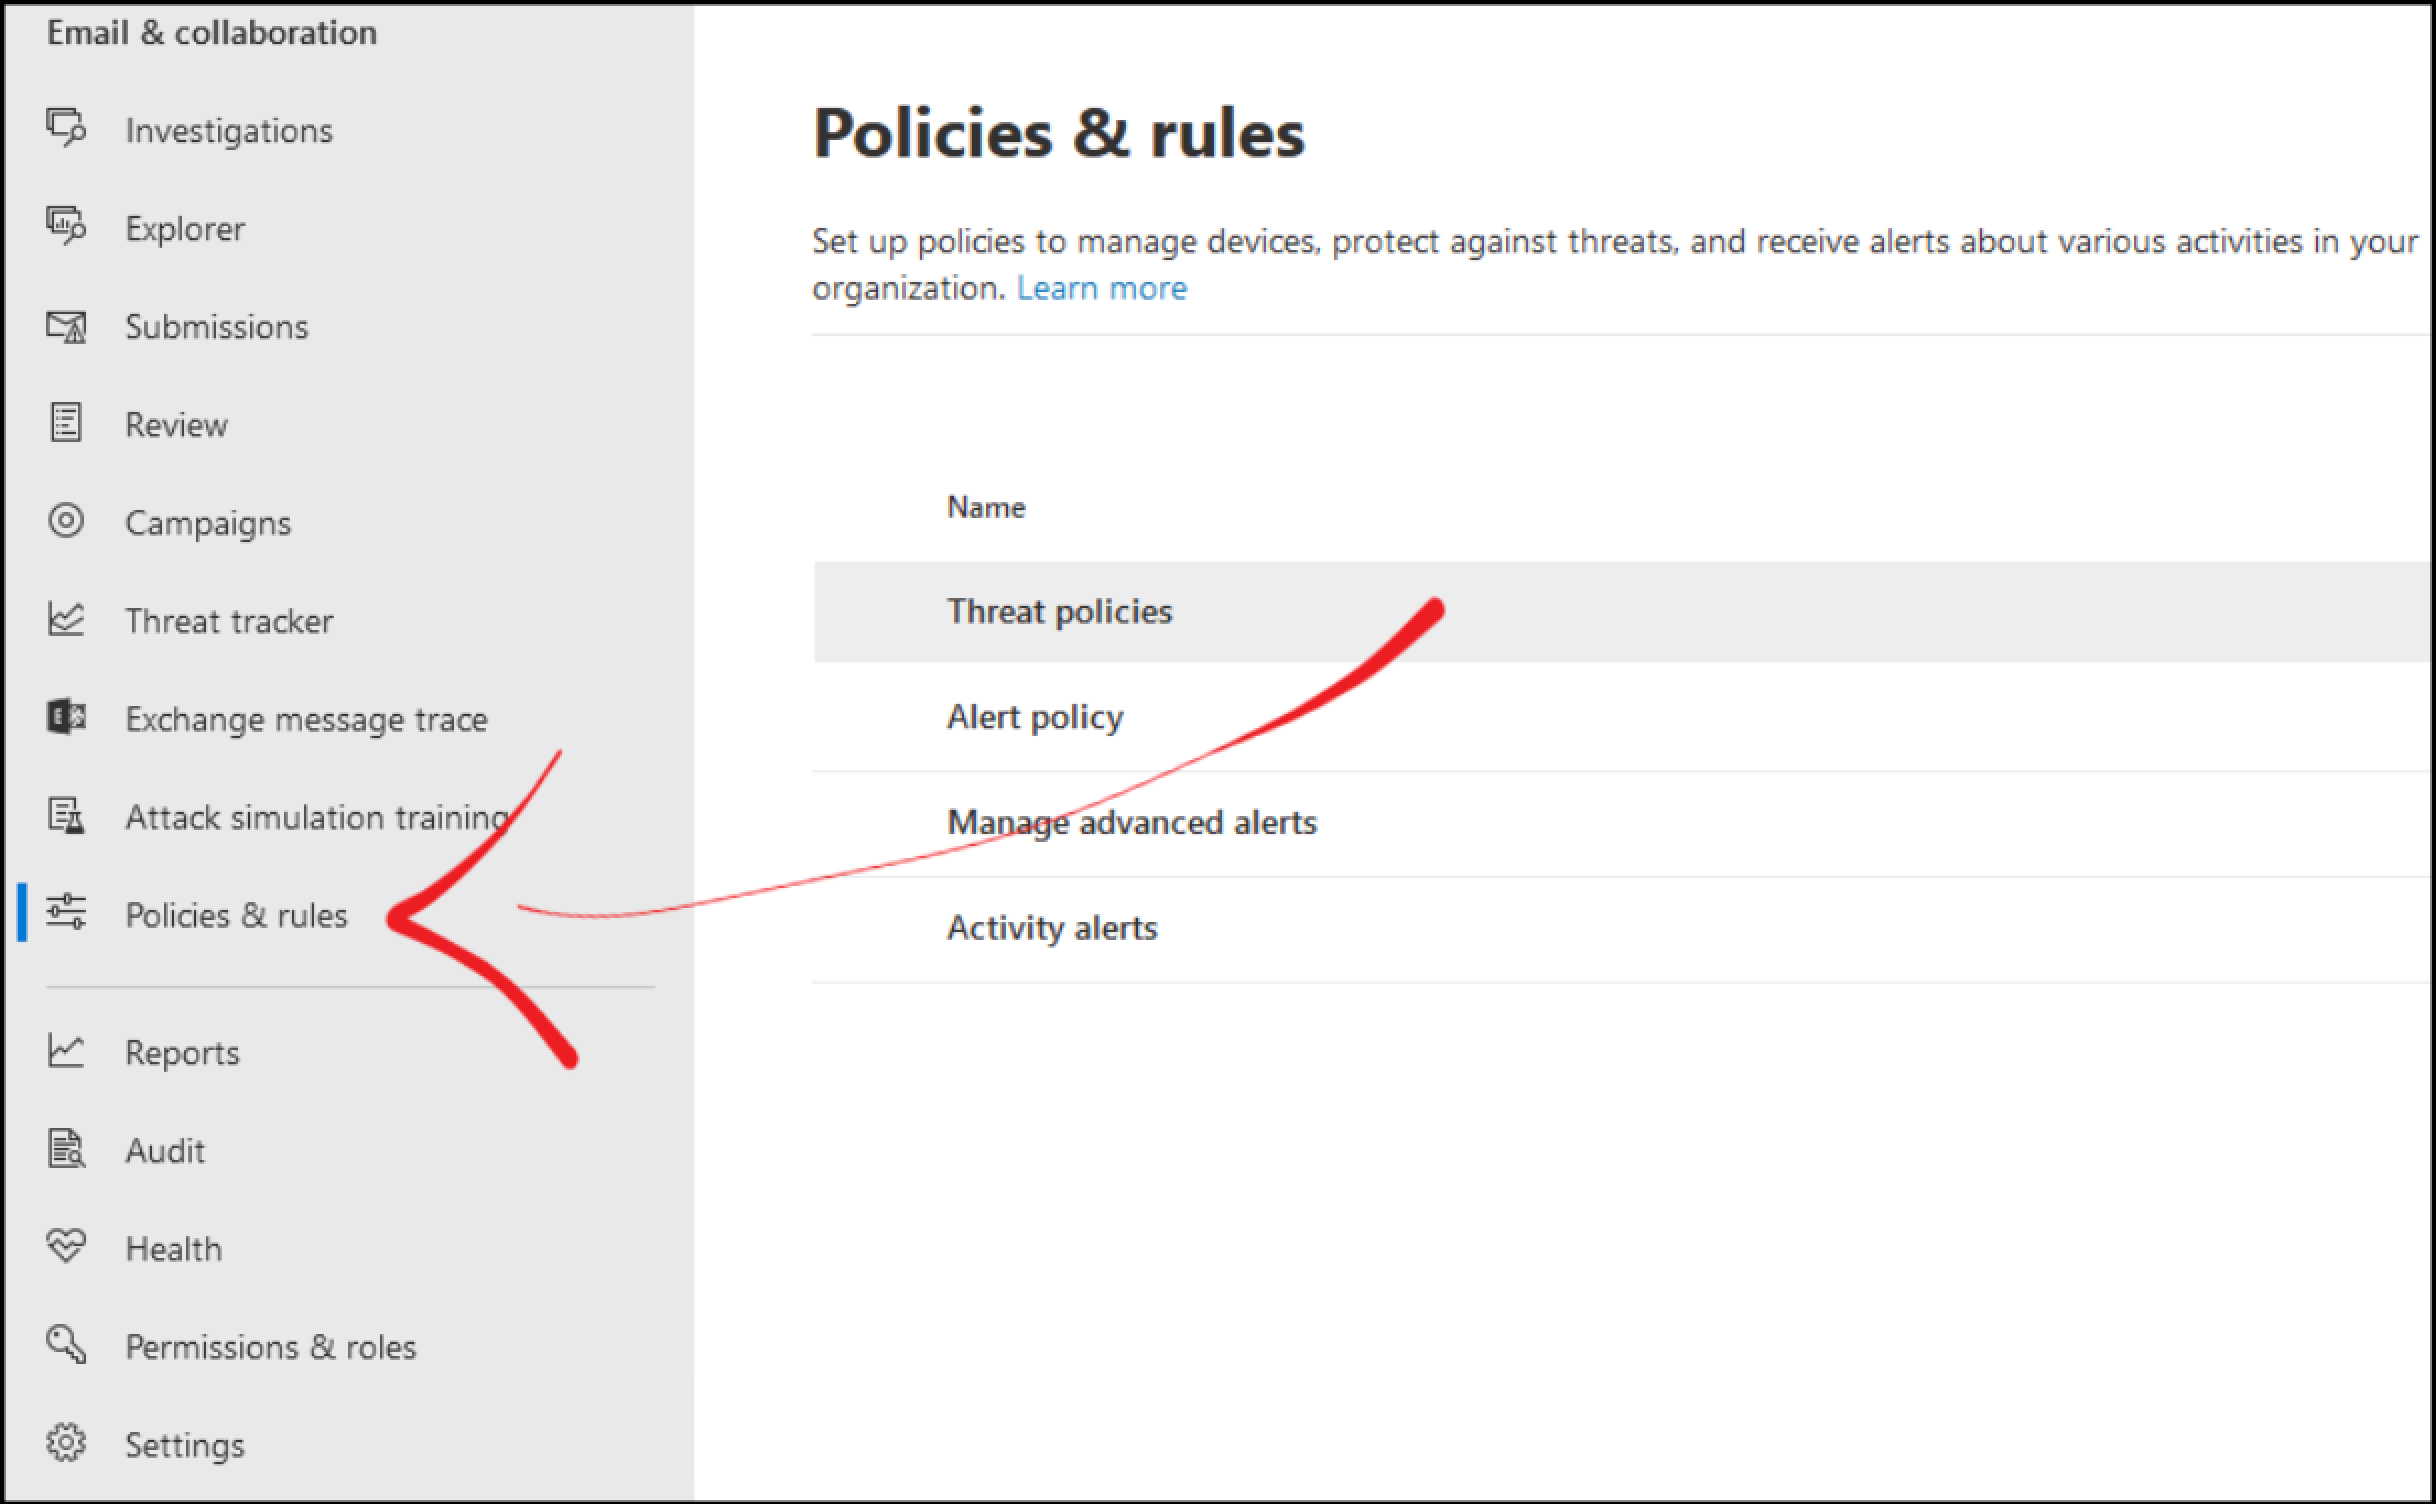
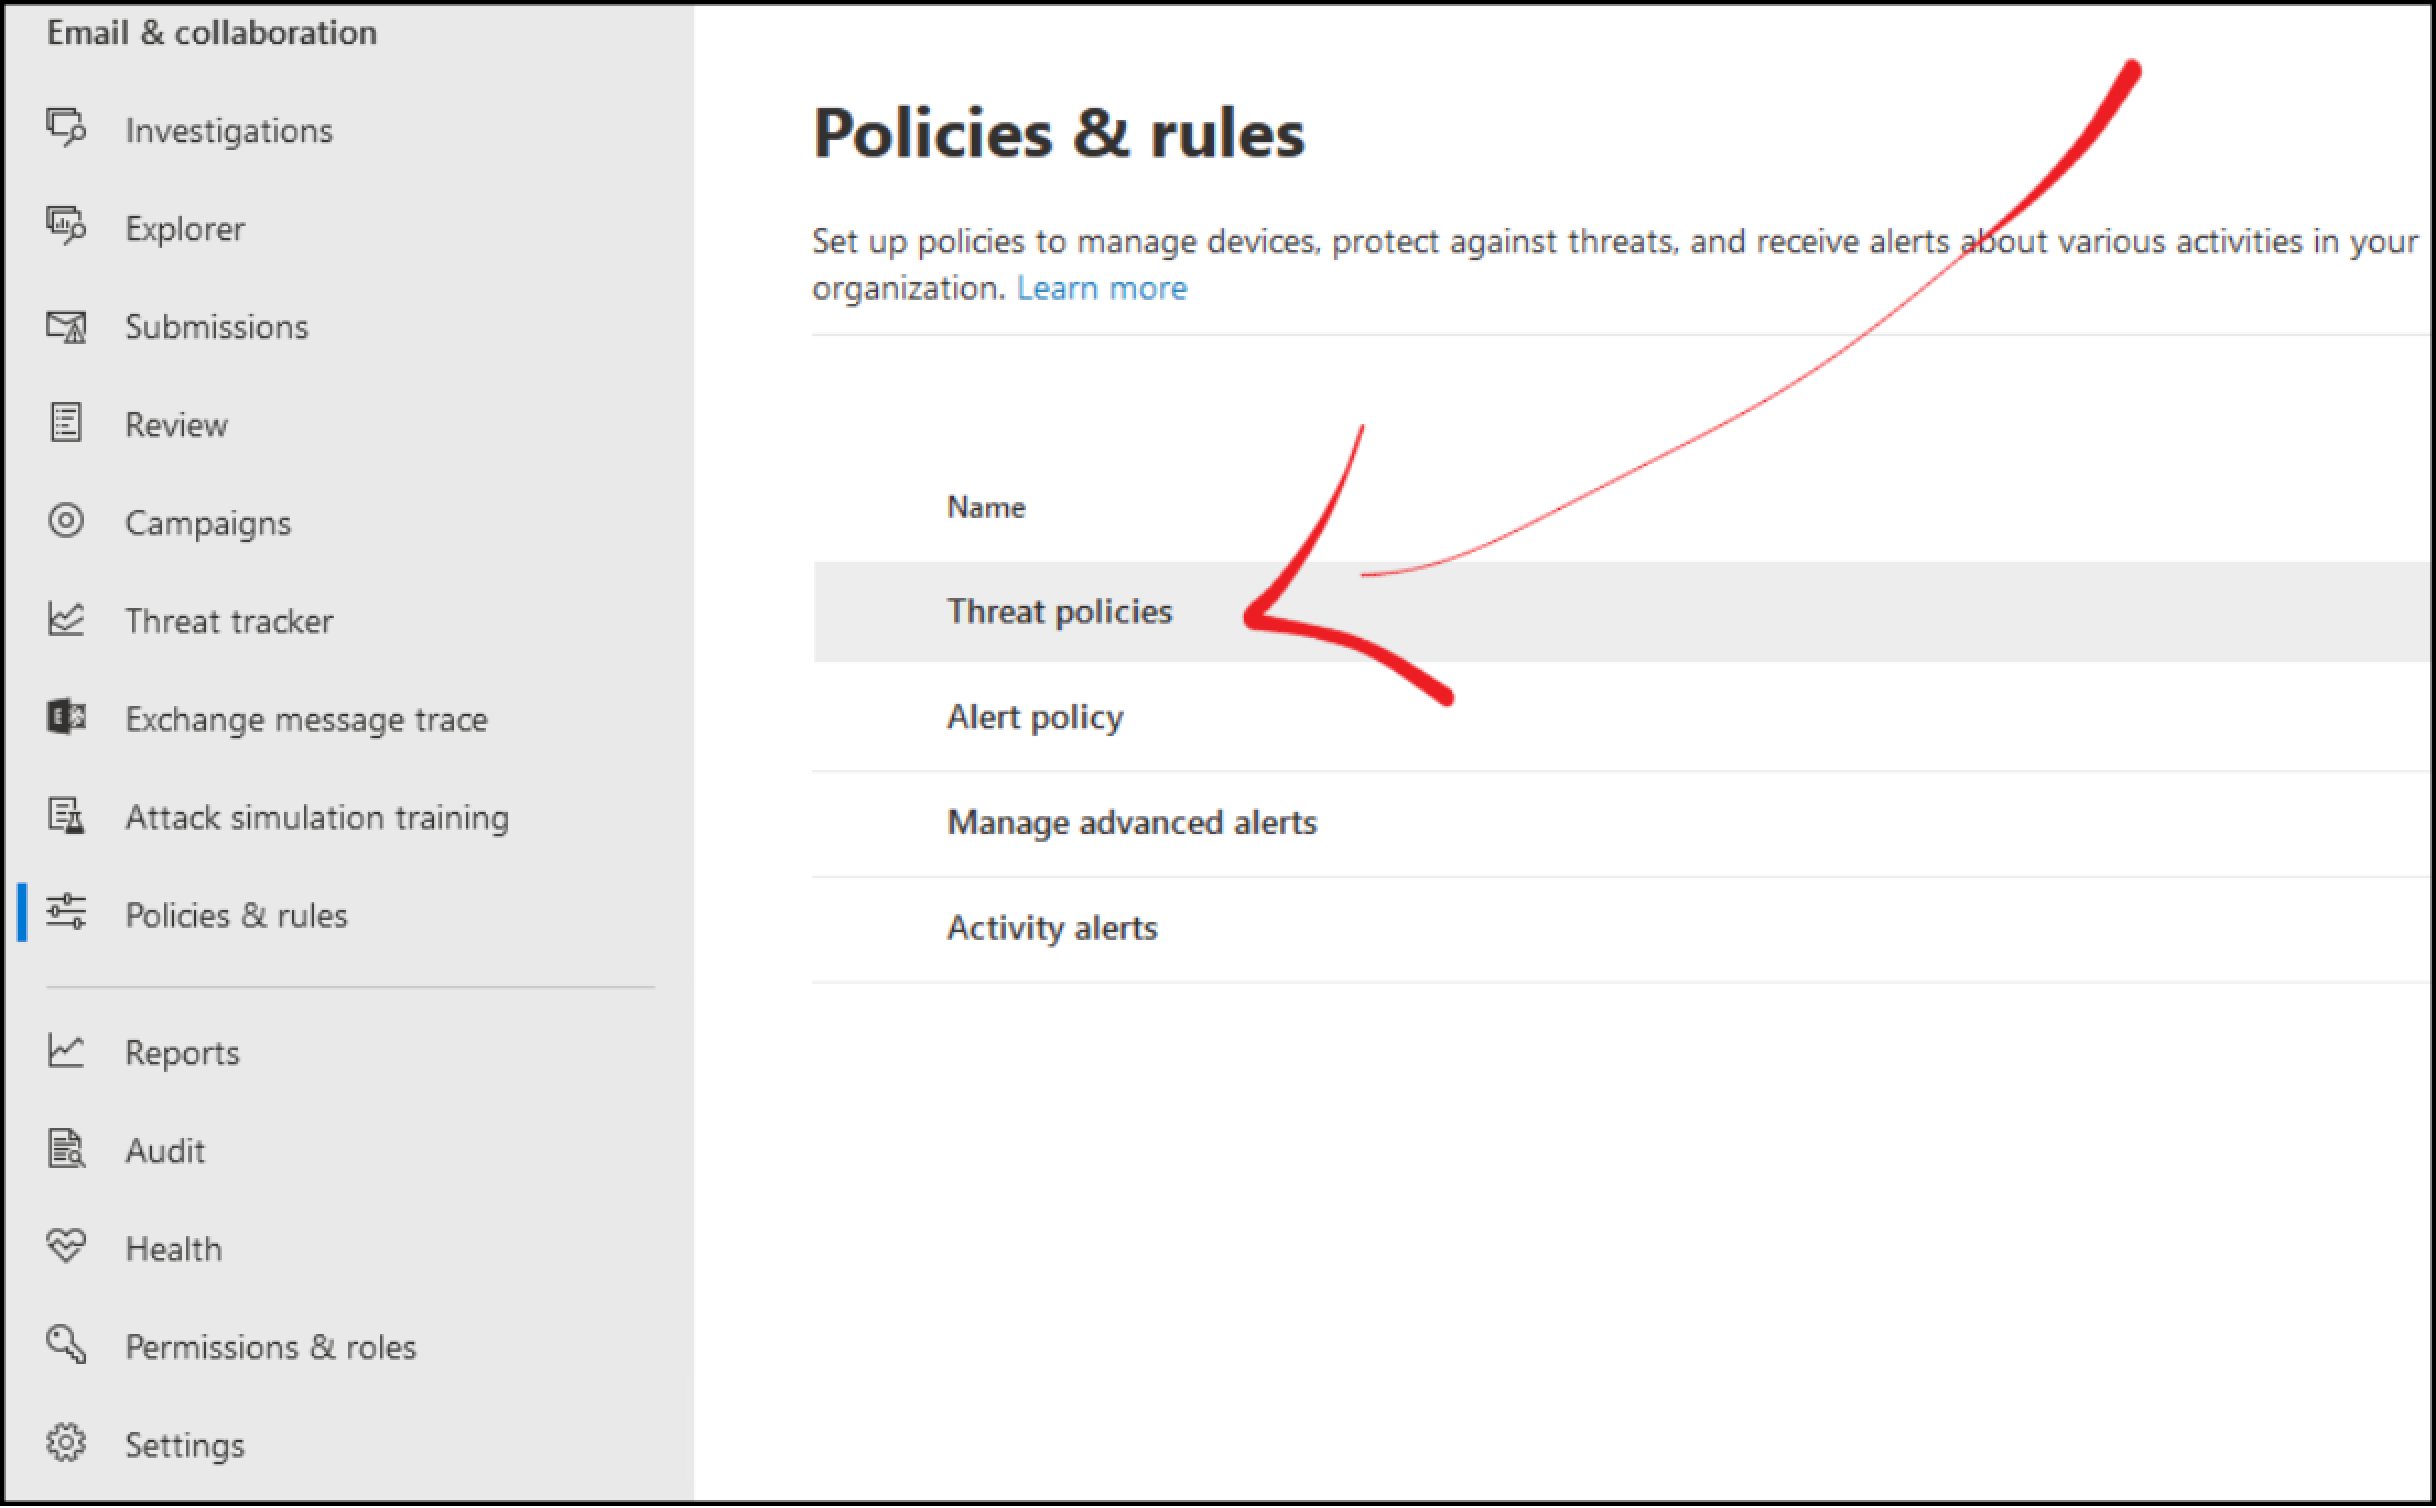
3. Choose Threat policies
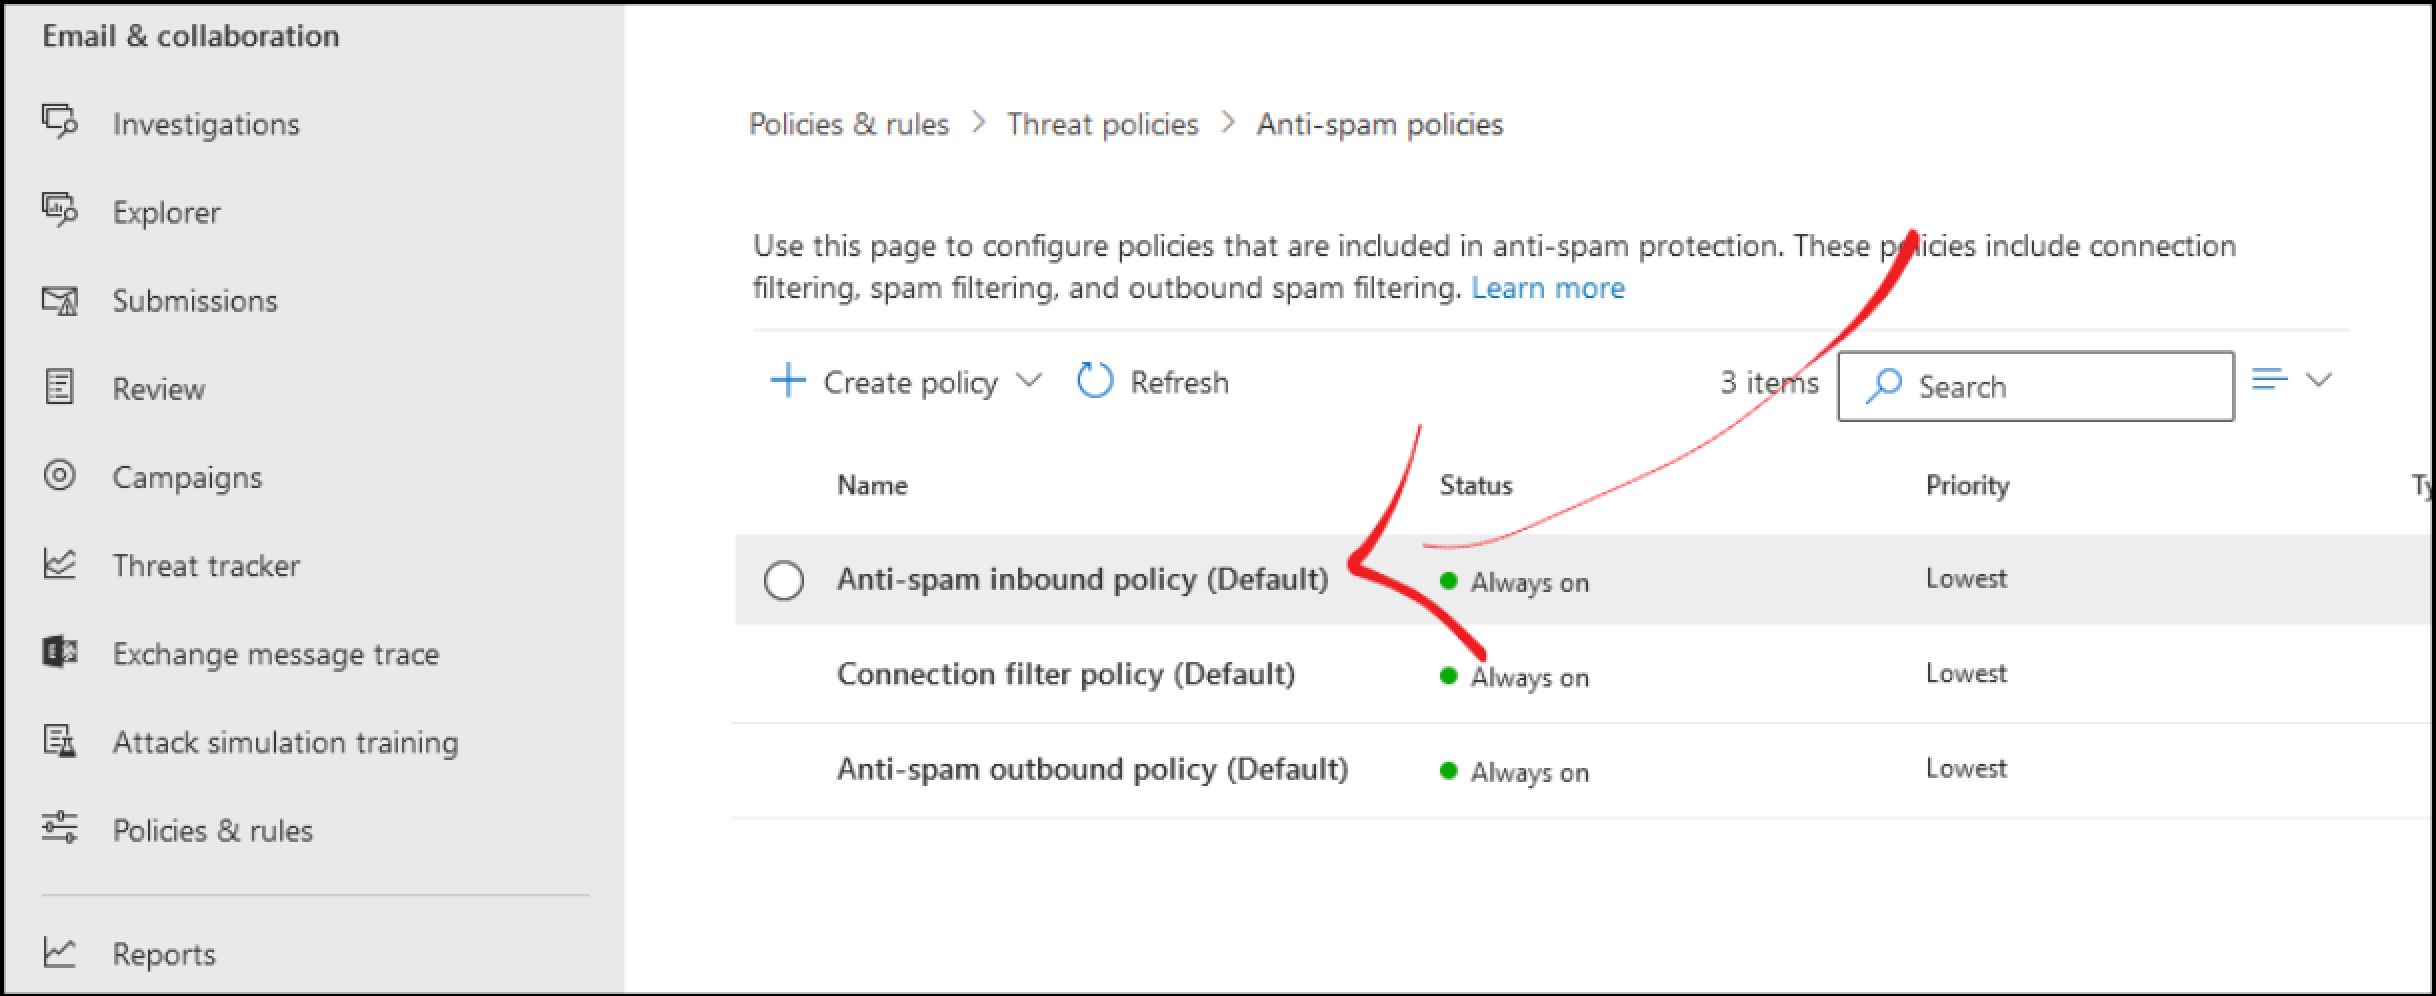
4. Select Anti-spam inbound policy (Default).

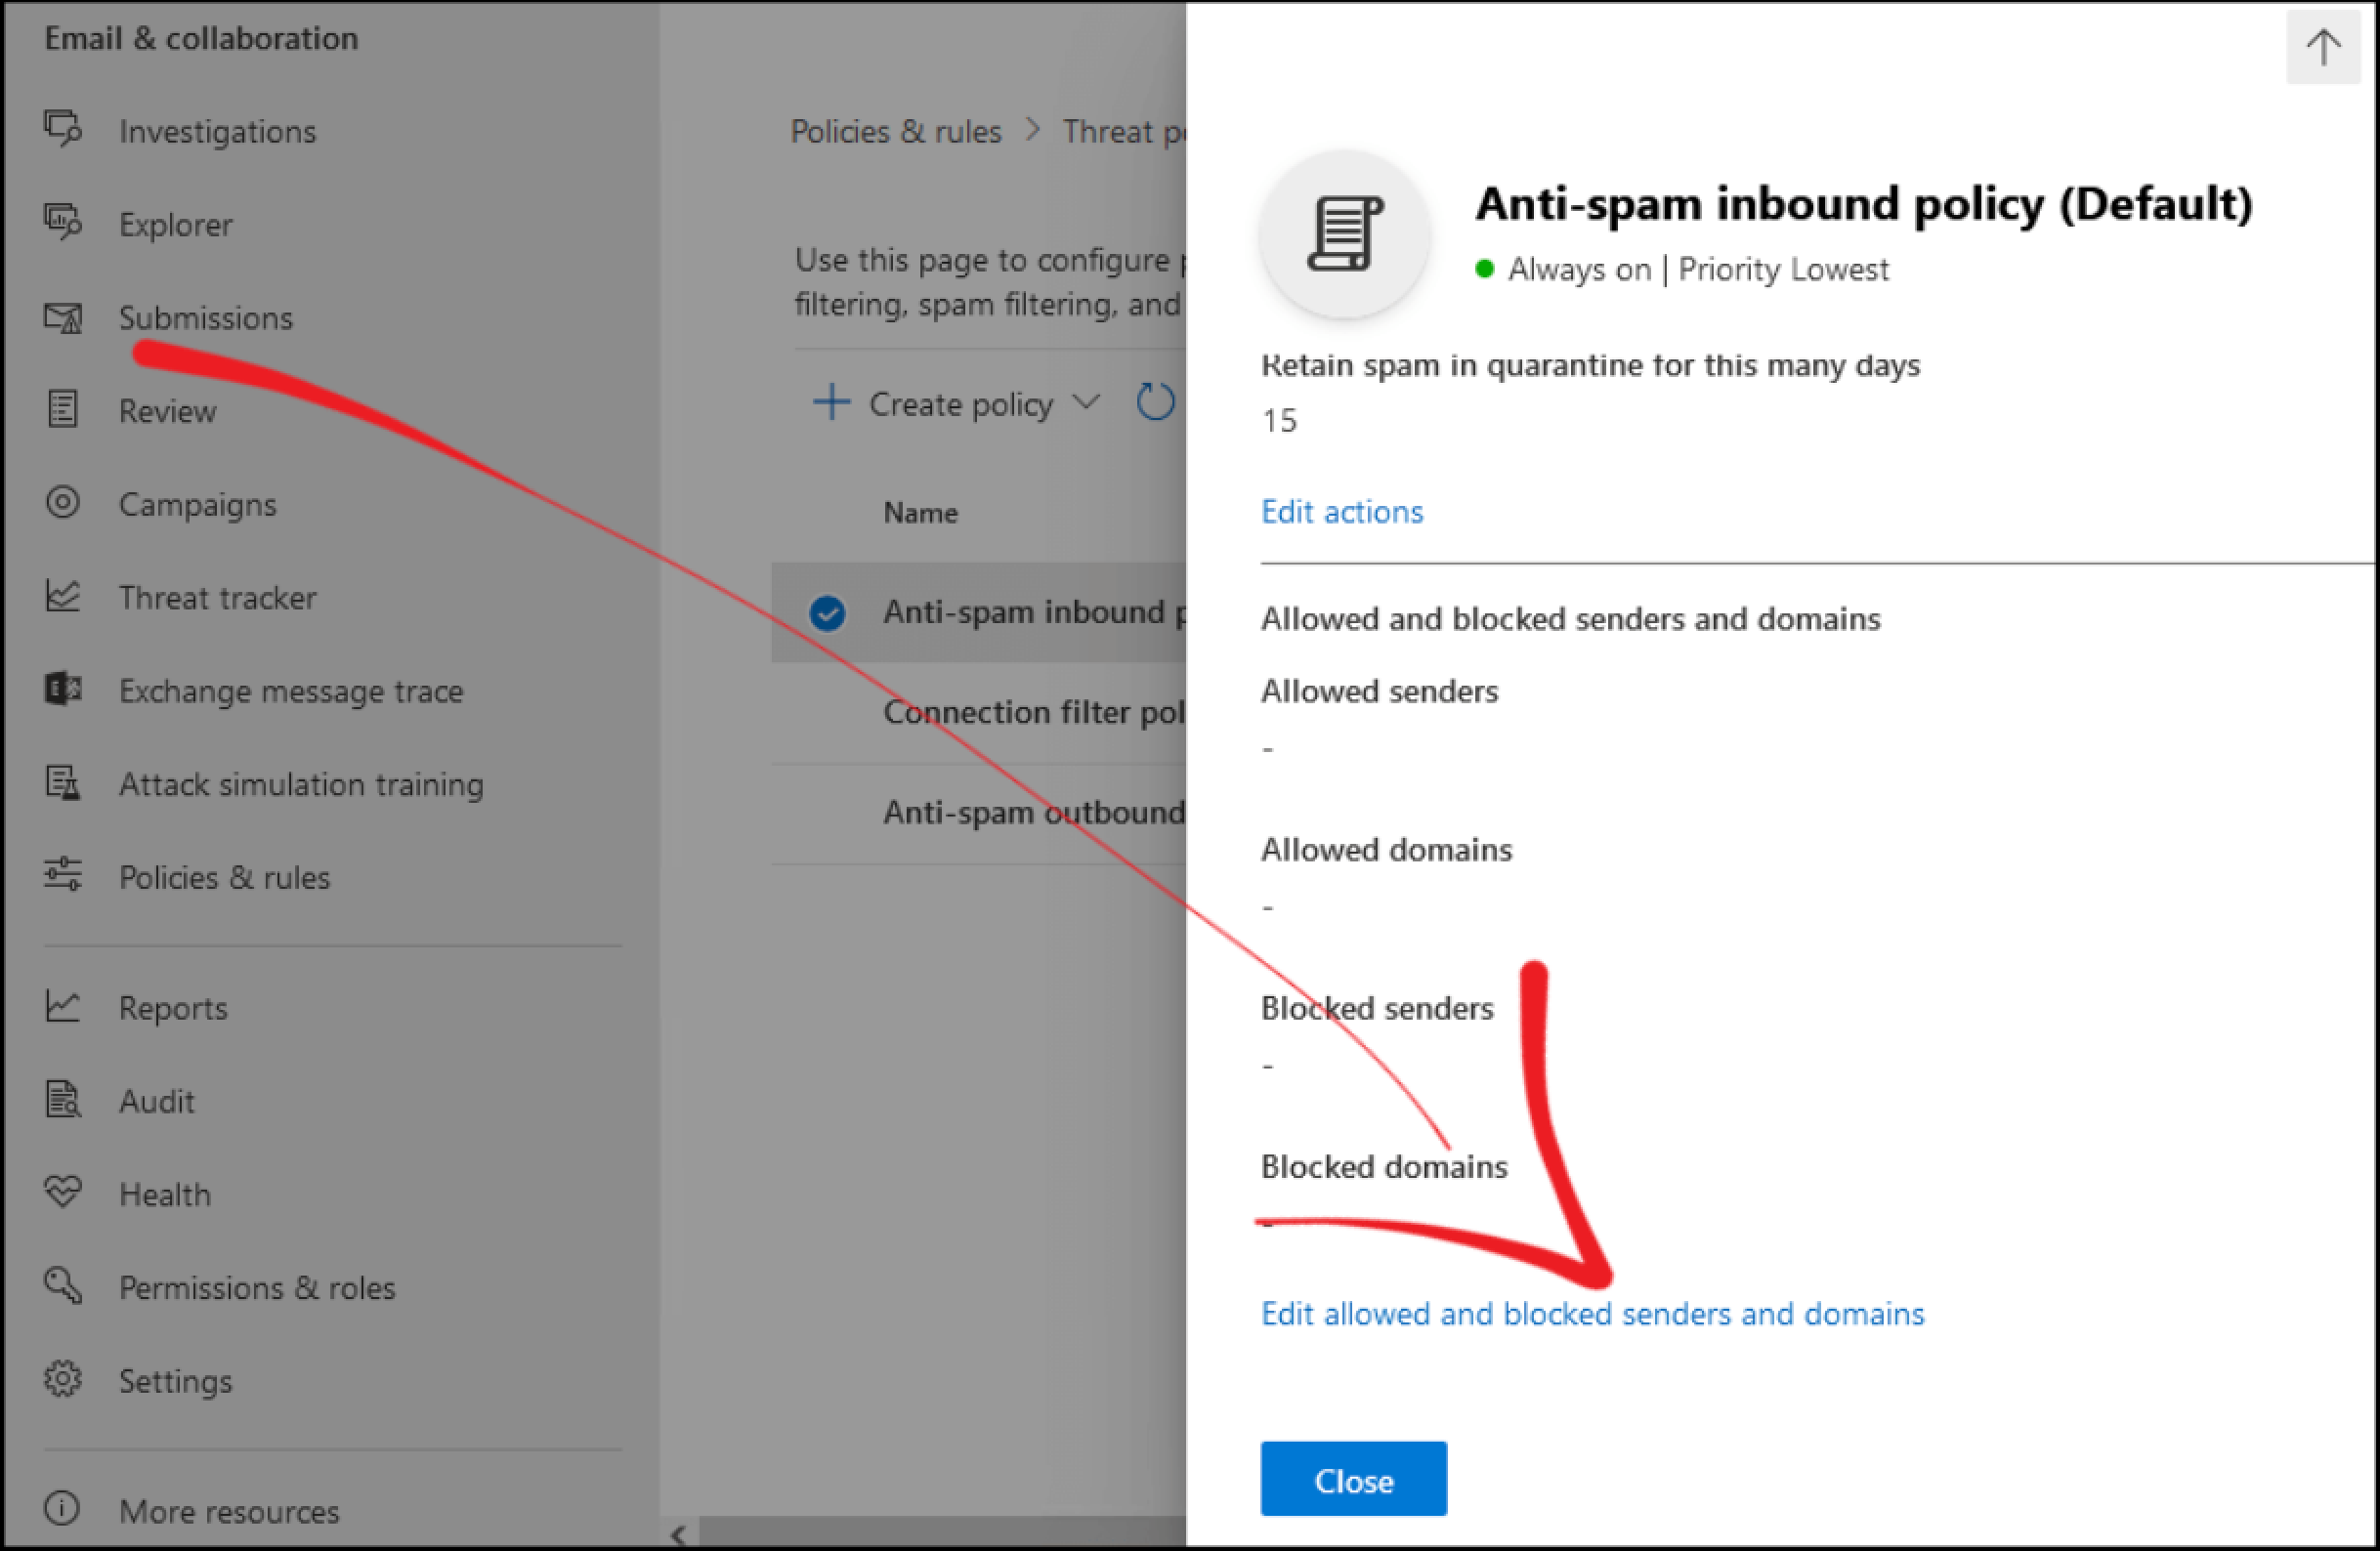
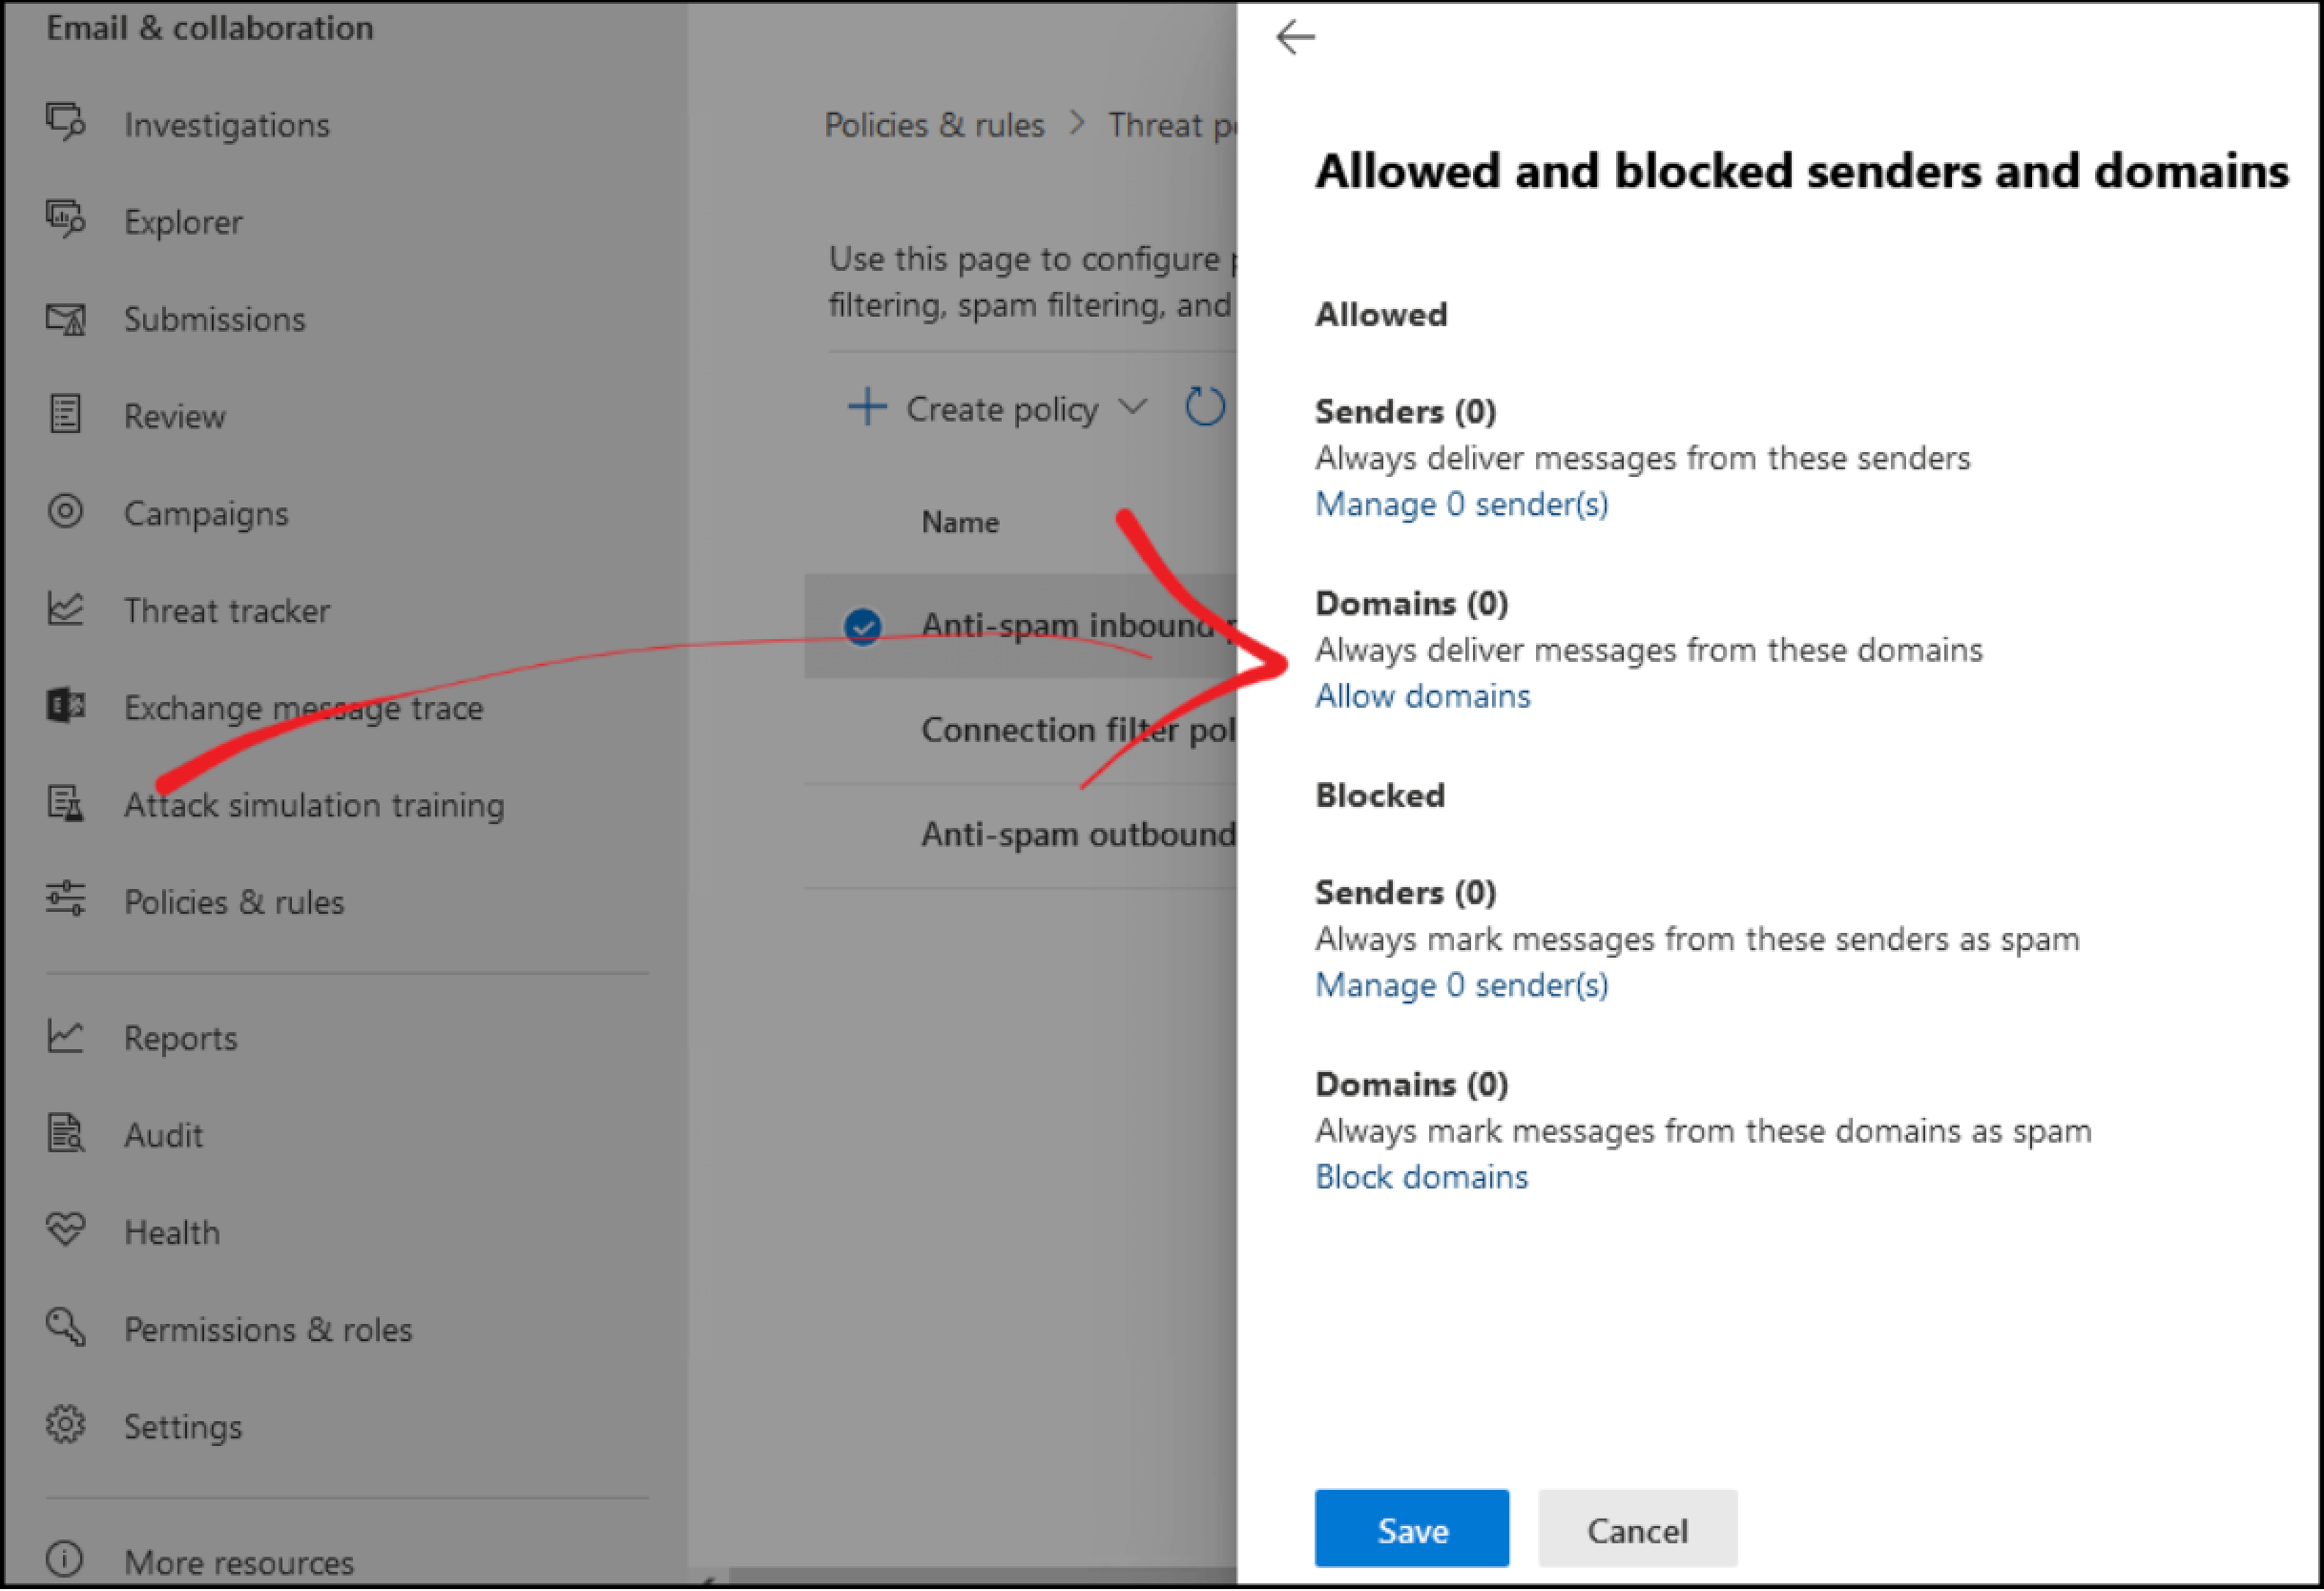
5. Scroll down and click on Edit allowed and blocked senders and domains.
6. Click on Allow domains.
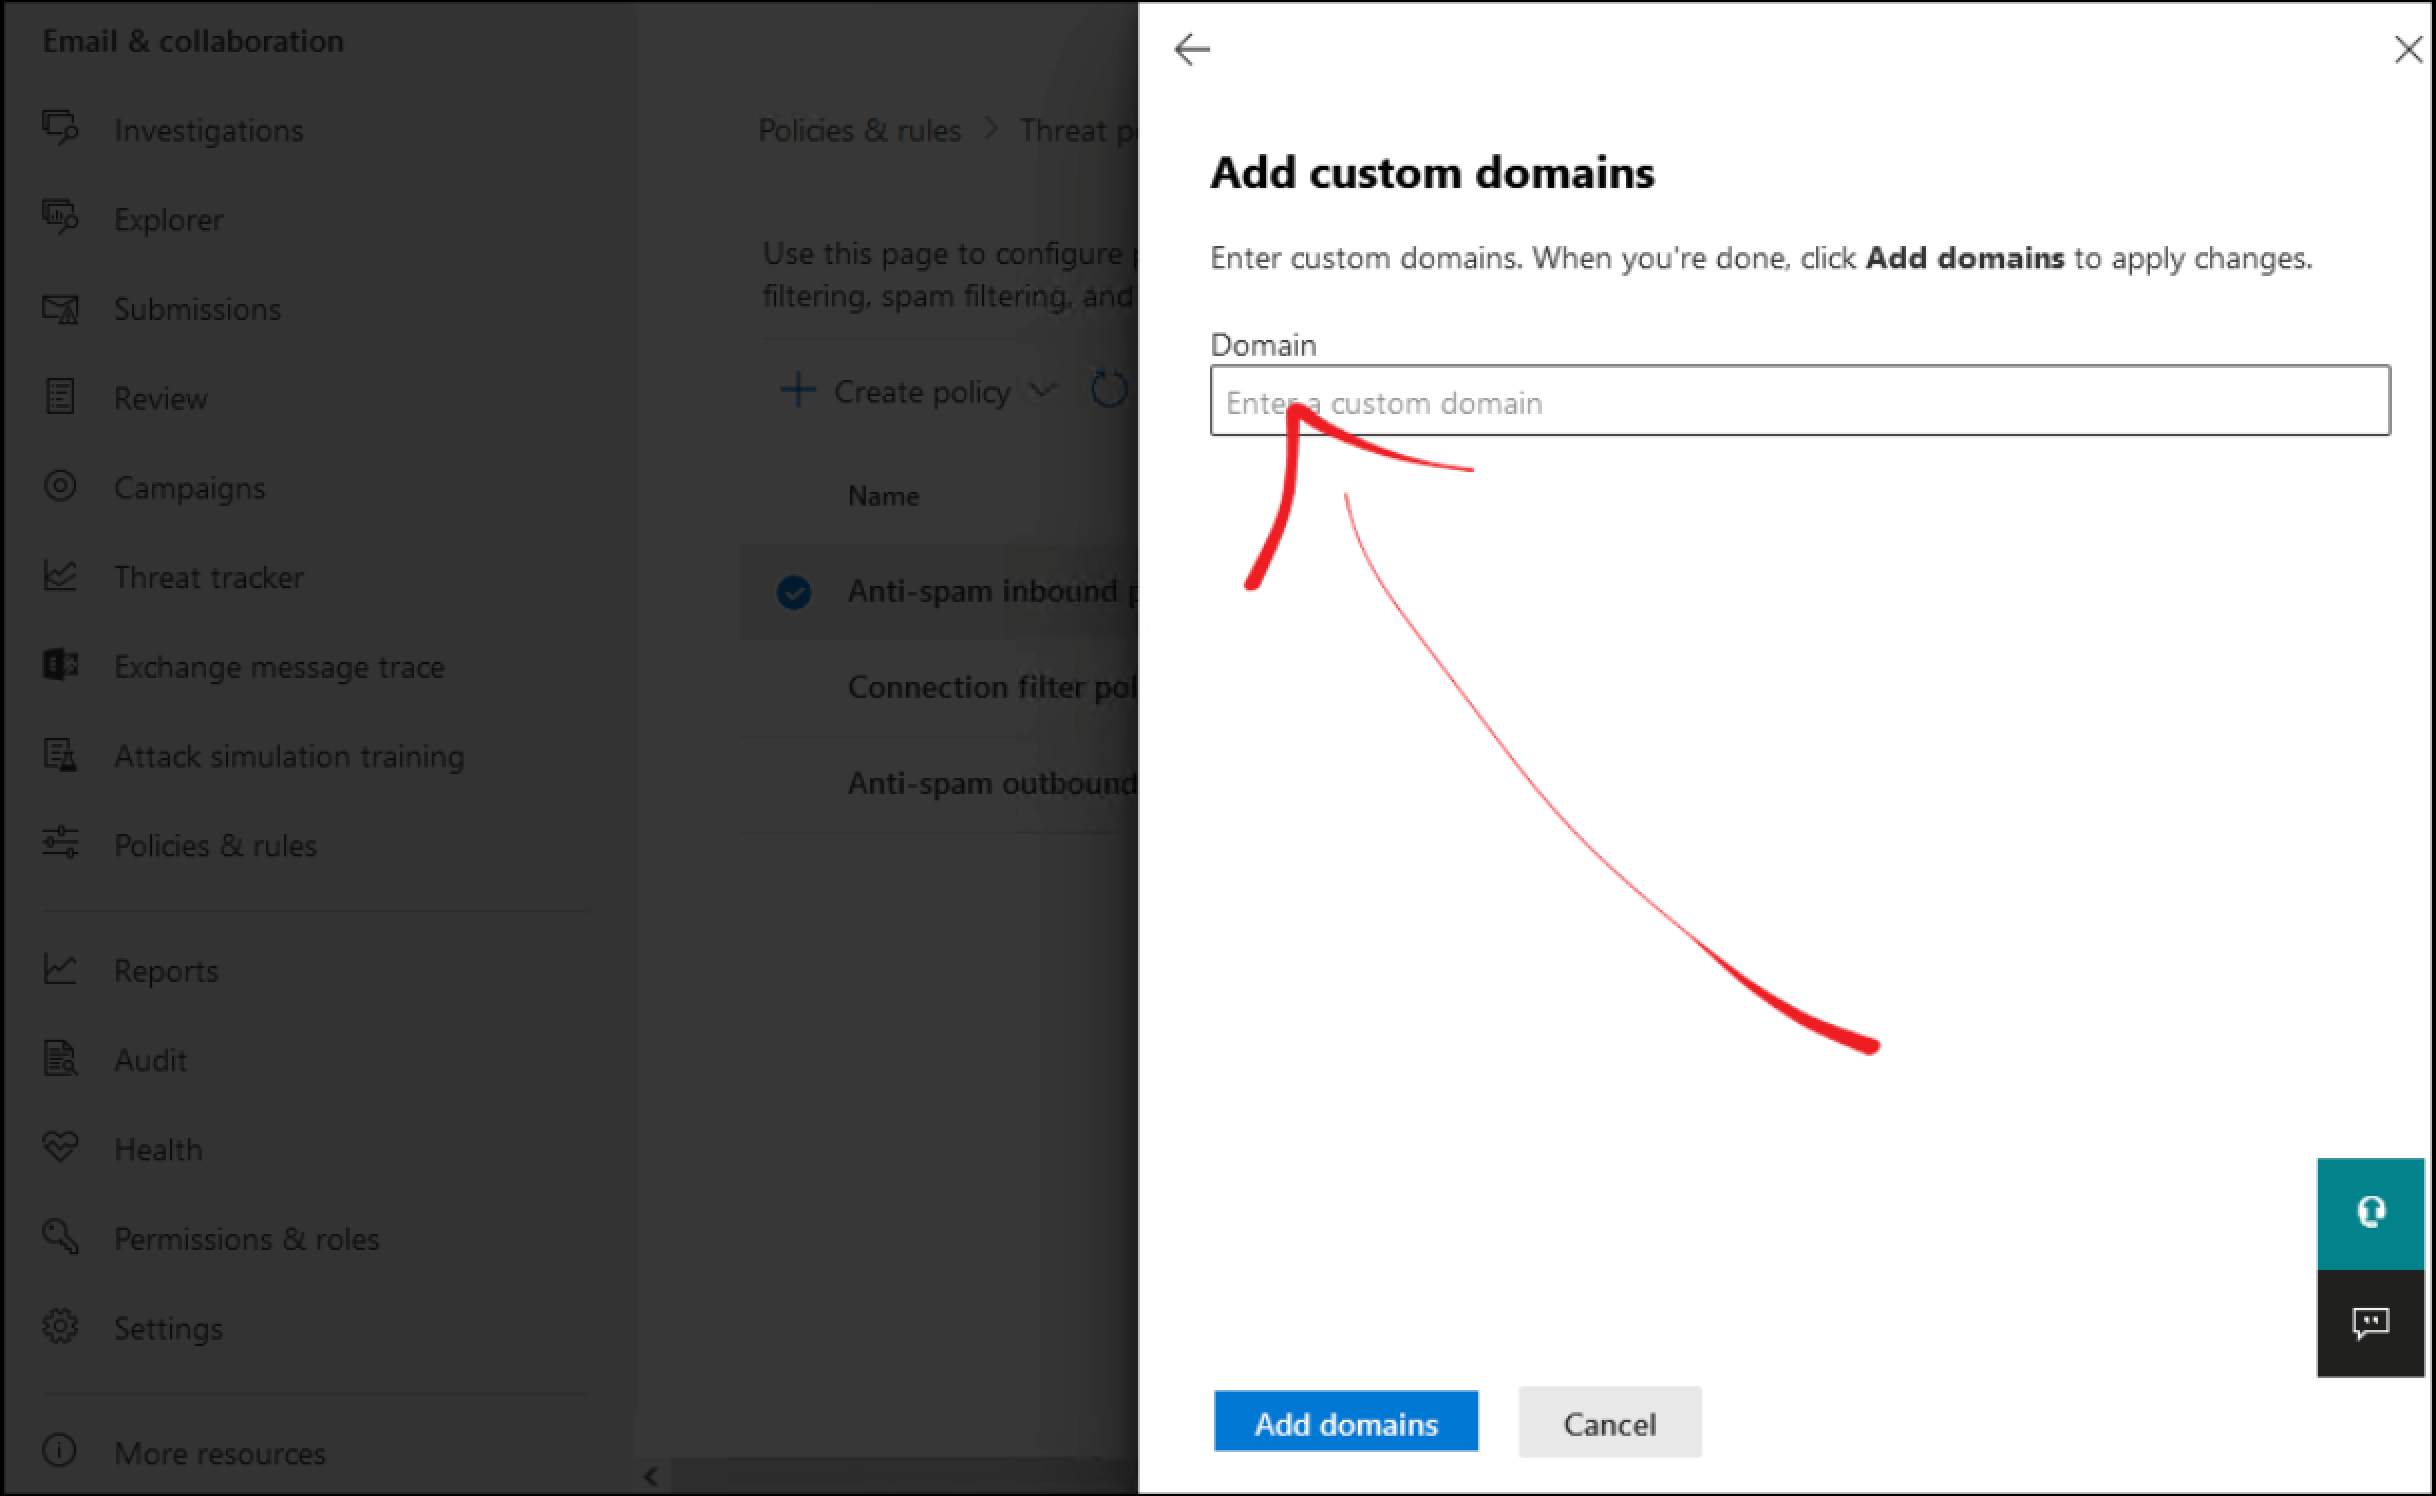
7. Add the domain that you want to allow (whitelist).
Provide a name for the list, and add domains “noreplywork.in,” “m.noreplywork.in,” “images.mitigata.com, noreplywork.com” and “d2tcd99ls9eqkl.cloudfront.net” for whitelisting phishing domain, then “Save”.
Please note: The domain is provided when selecting the template during the setup of the phishing campaign.
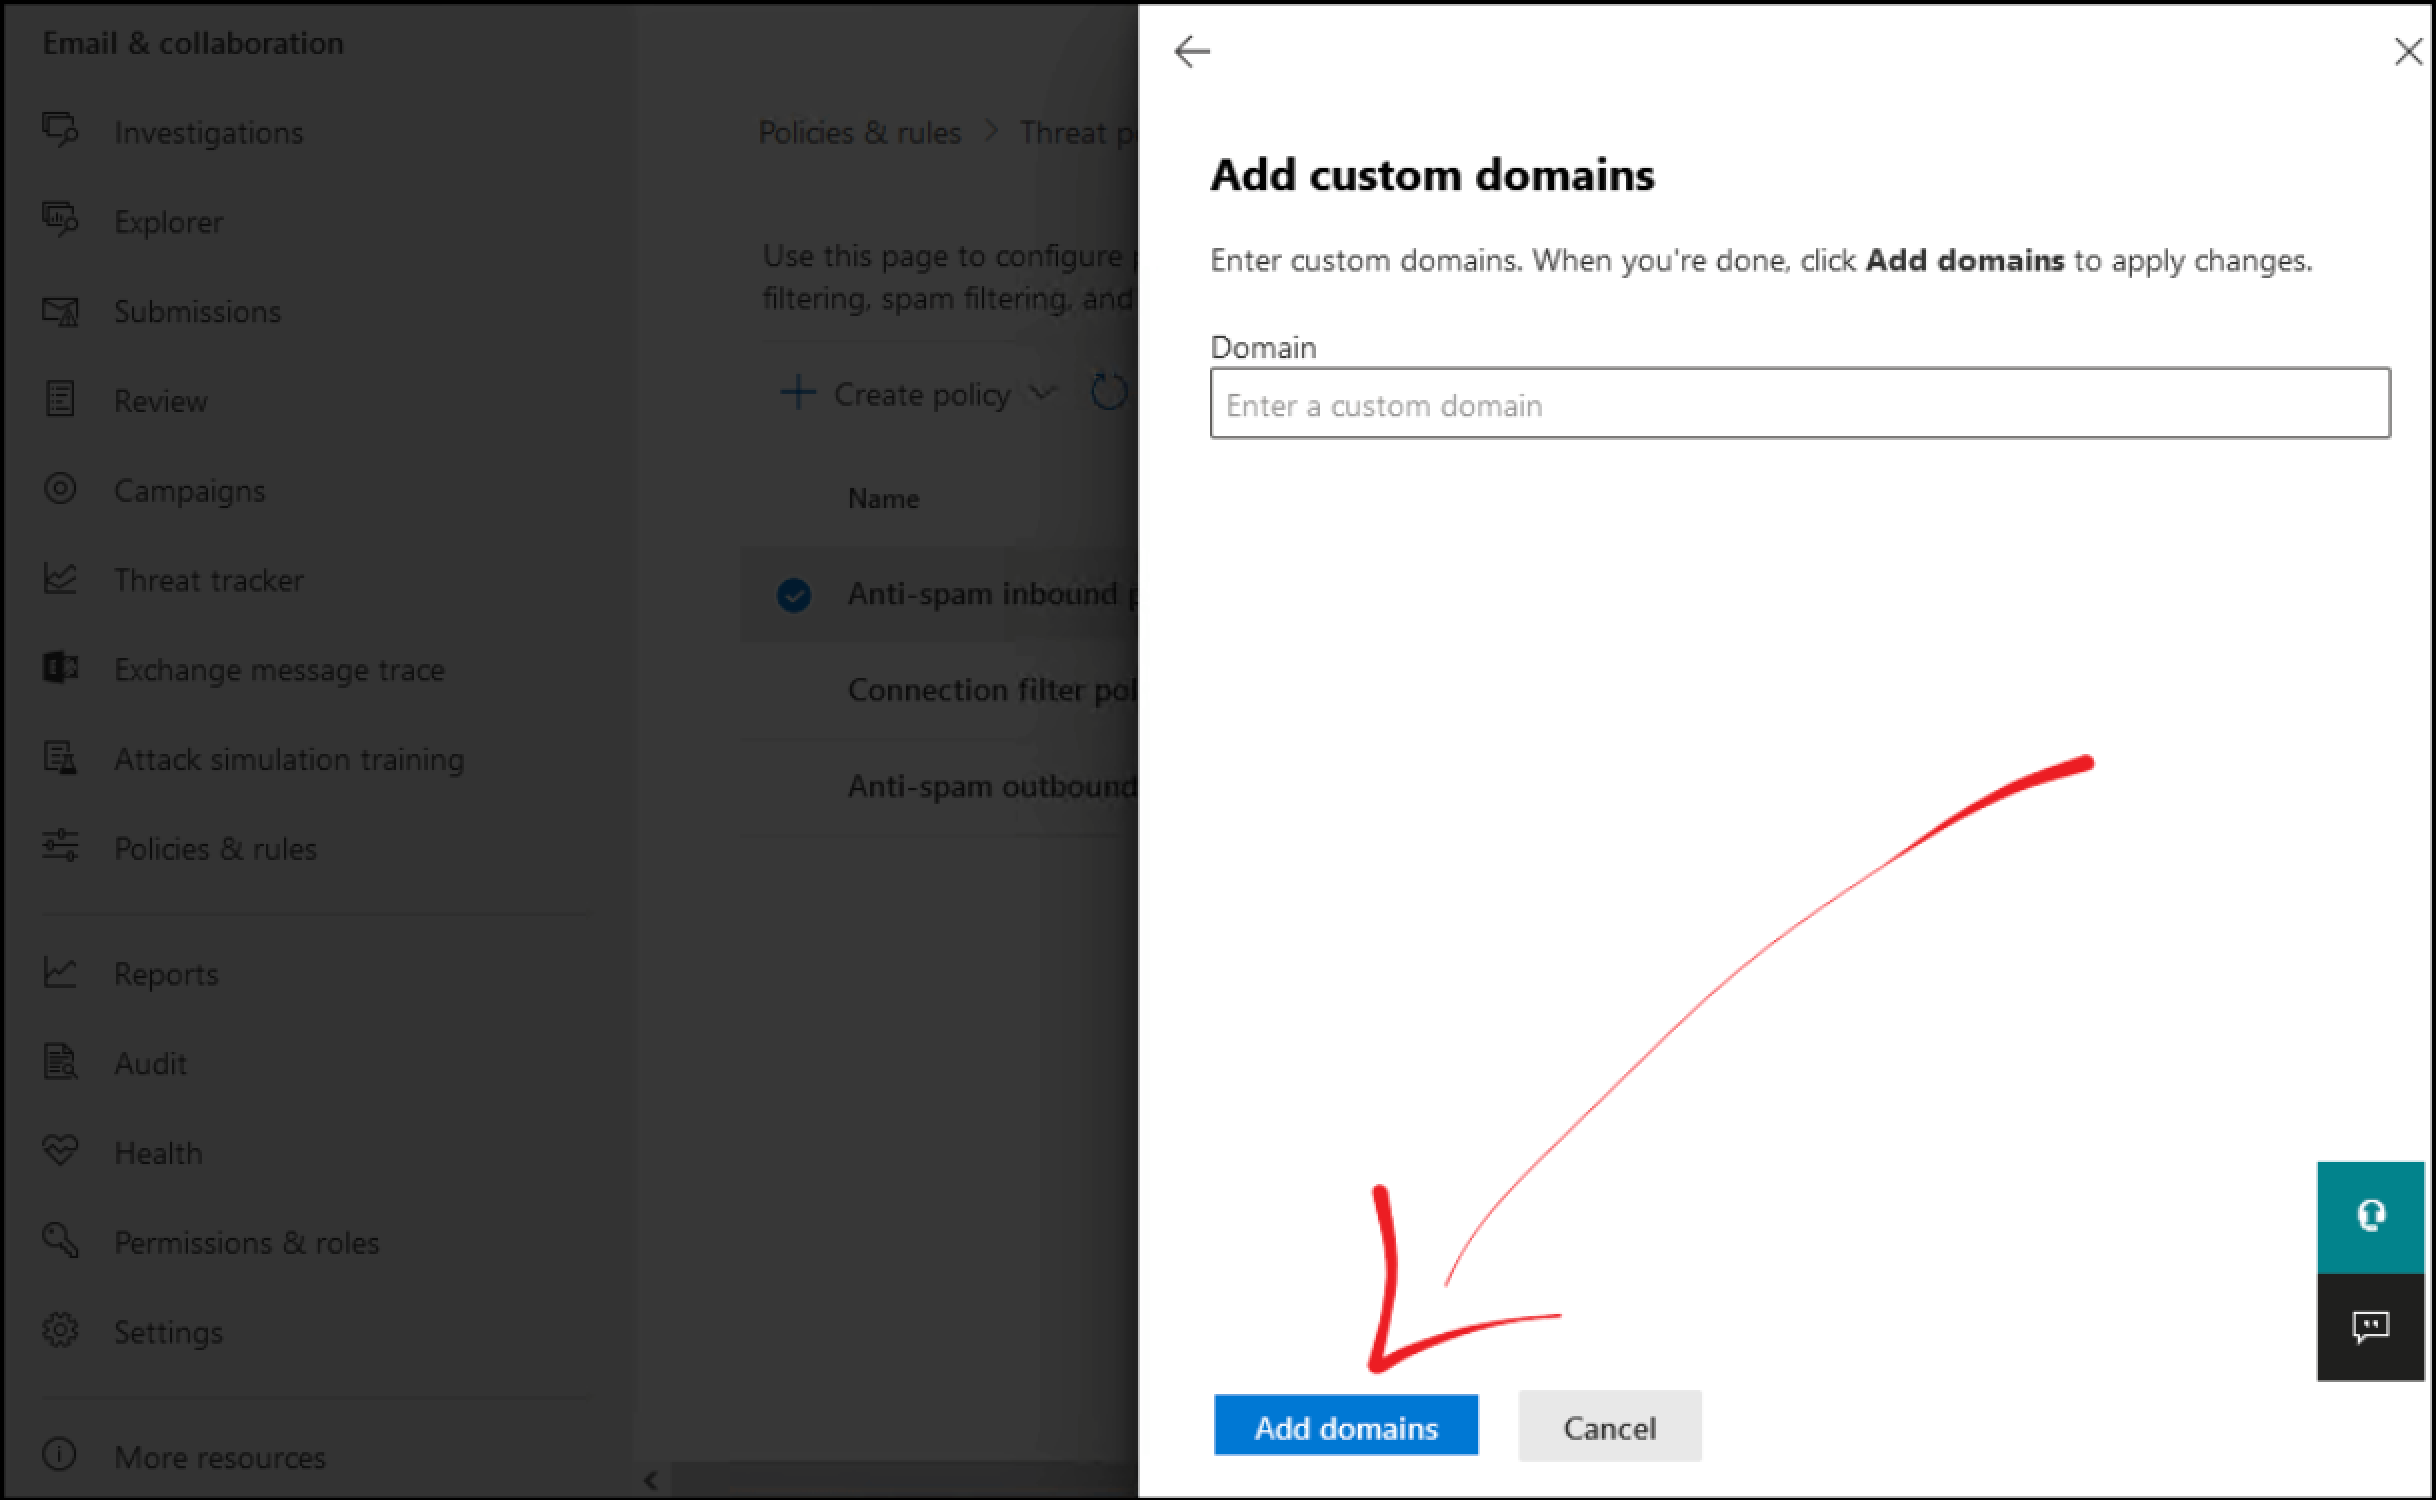
8. Click Add domains
9. Click on Save
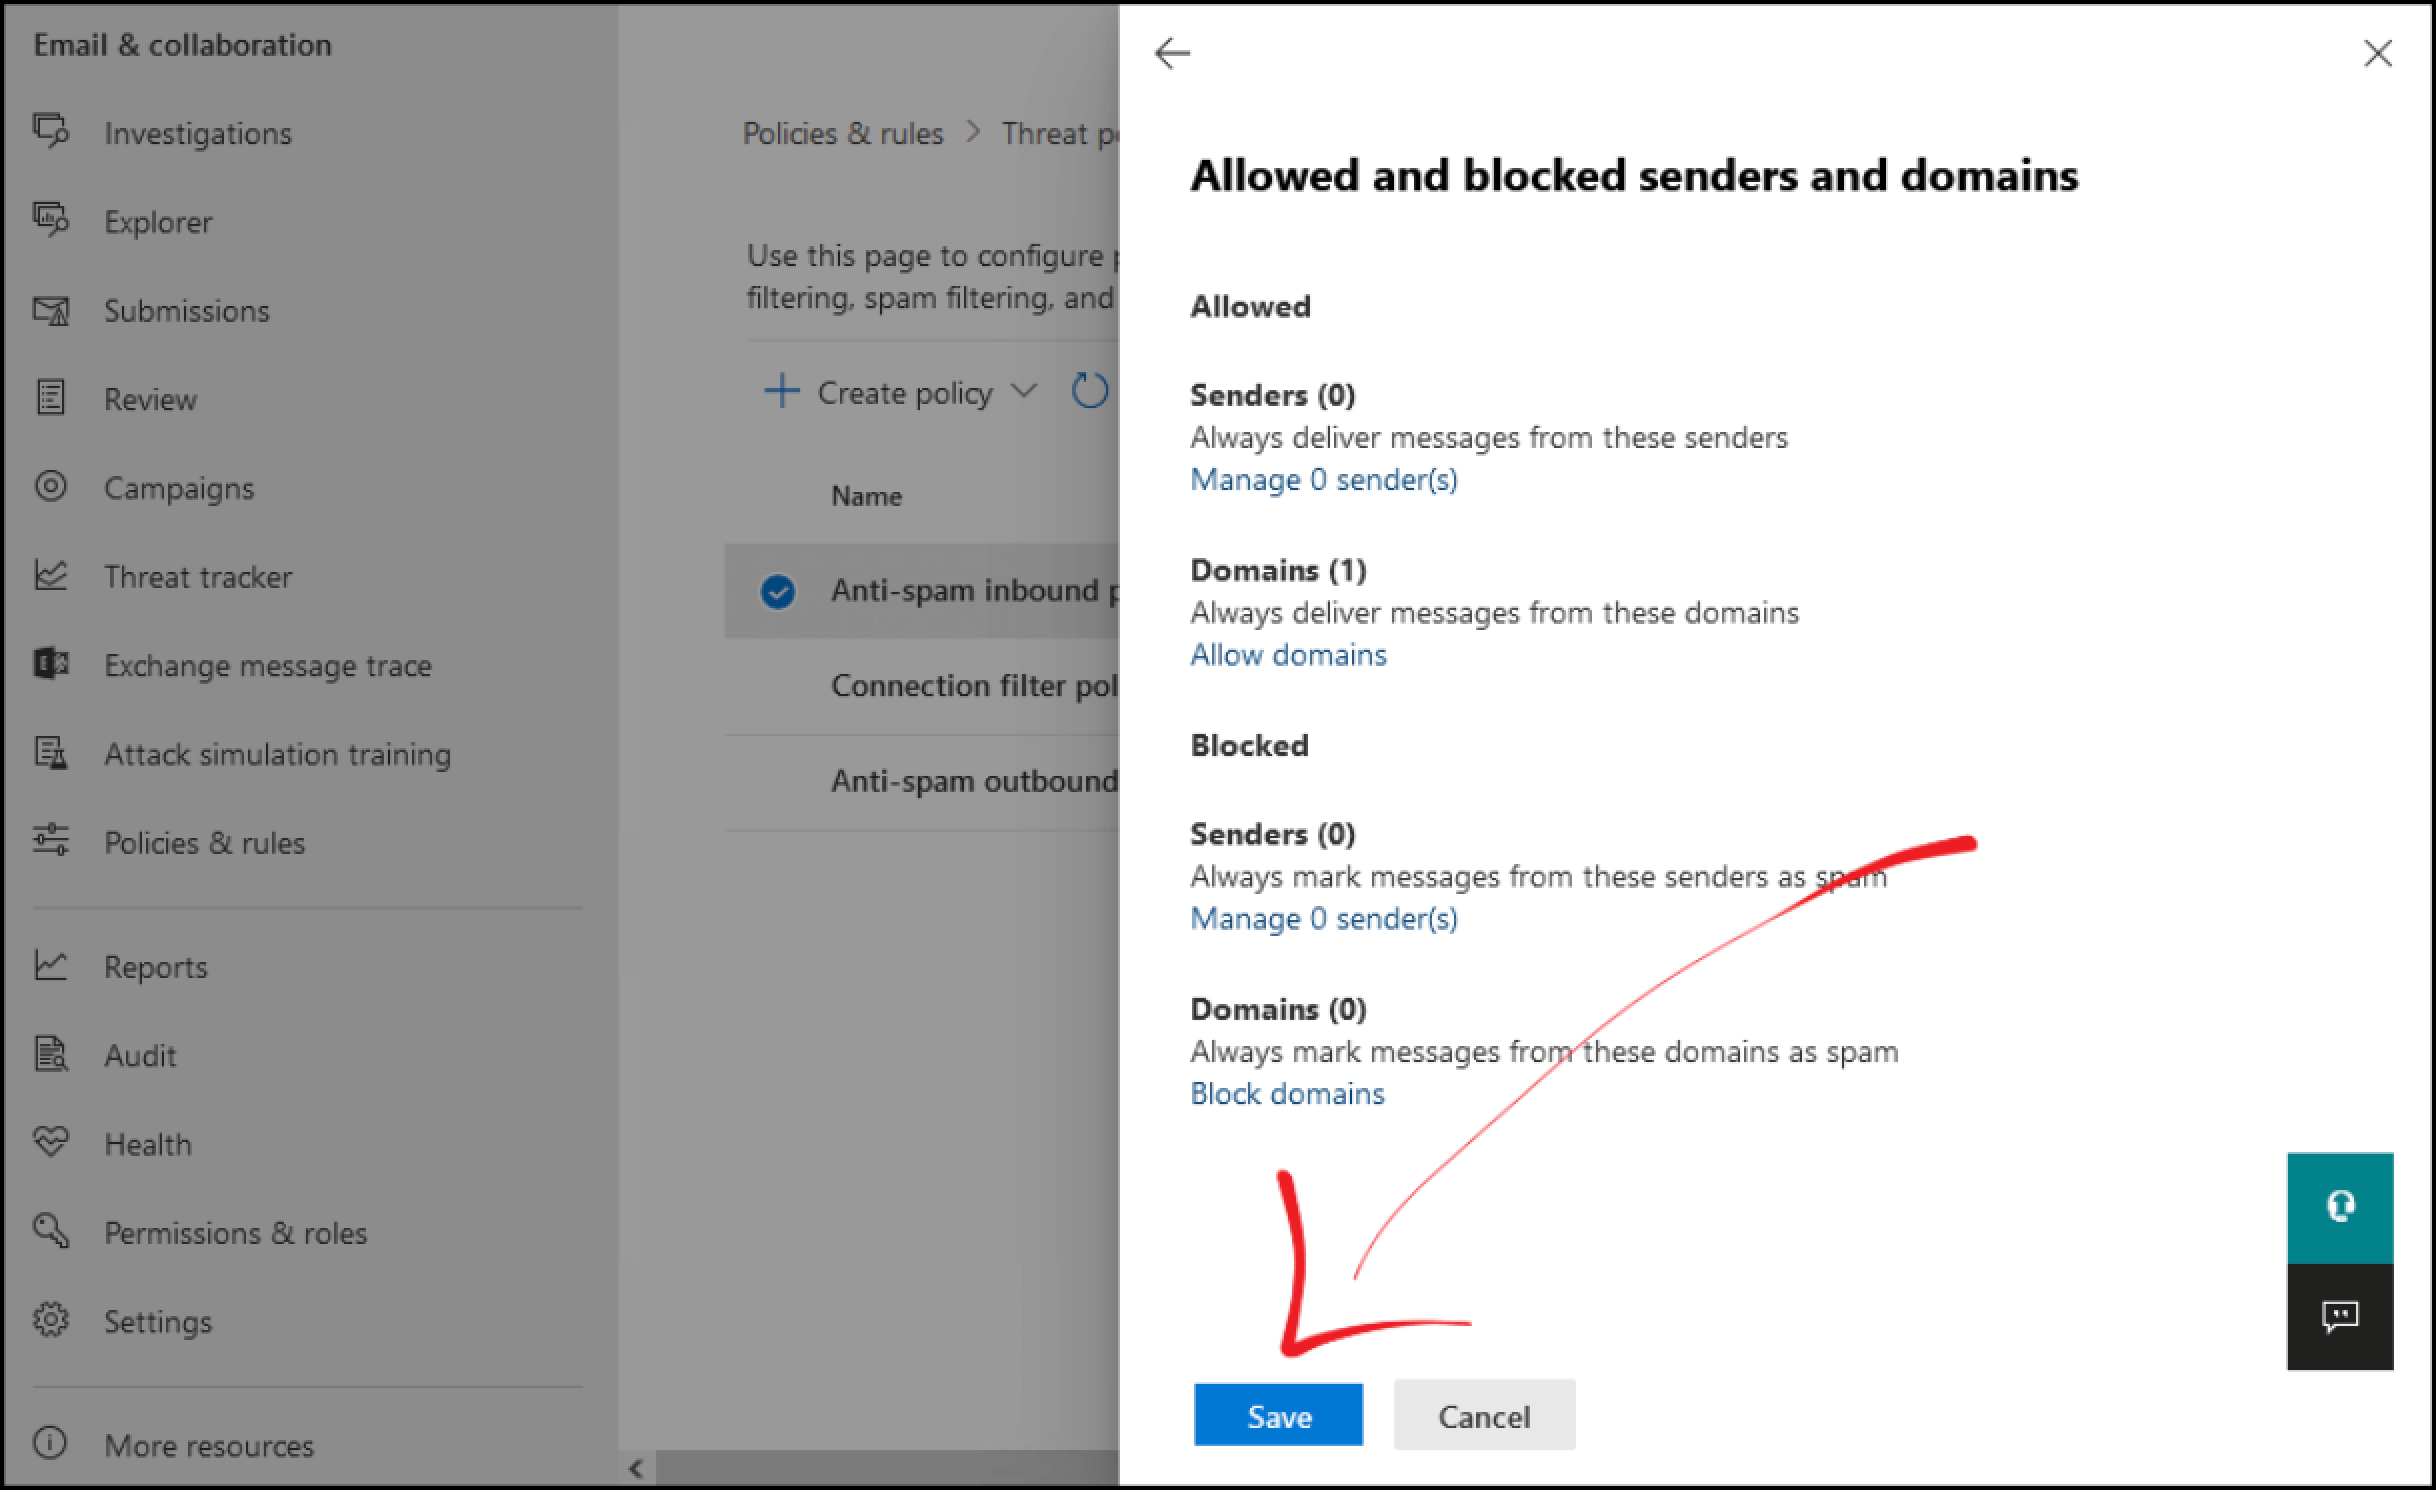
That’s it 🎉 You’ve successfully added the domain to the spam filter allow list. From now on, all emails sent via this particular Mitigata phishing domain will not be marked as spam.
Note: Each phishing campaign uses a separate domain, so you’ll need to make sure you have added them to your whitelist before you send any future campaigns.